Splitting Canals
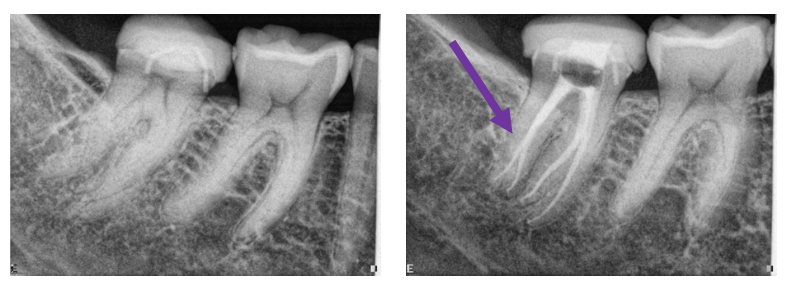
In an endodontic office we tend to see more complicated cases. That is common, expected and the challenge is part of the enjoyment of the case. But one type of morphology that brings a unique difficulty is the “splitting canal system”. Often referred to as a Weine Class IV canal, this canal system has one orifice leaving the pulp chamber, but at some point within the root the canal will “split” into two canals and ending up with two separate apical foramen.
Figures 1 and 2 (figure 2 has a 3 canal split).
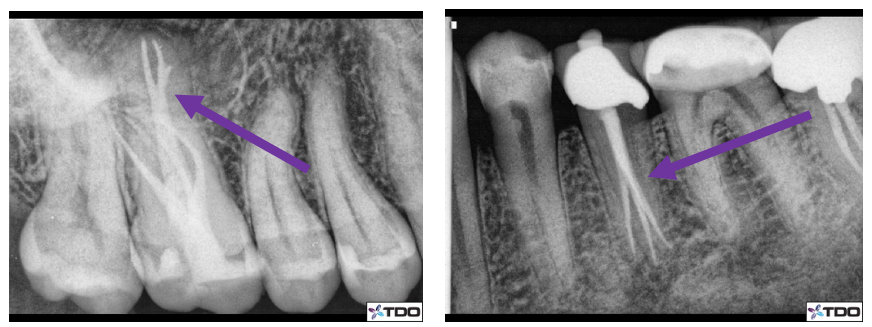
The first step is to recognize when and where the canal splits. Sometimes we can make this interpretation based on conventional 2-dimensional imaging with what is called a “fast-break” phenomenon. The image will show a distinct canal coronally and then at some point the canal seems to disappear.

Figure 3: Note the canal seemingly disappears (purple arrow). Expect or at least check for splitting canals at this point.
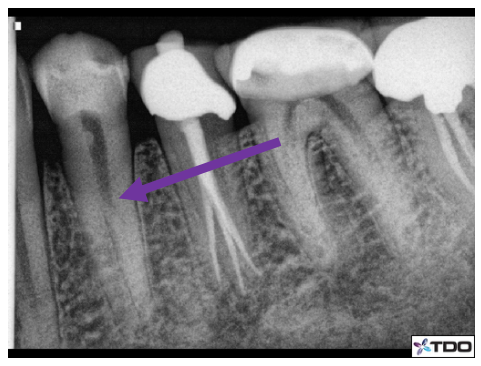
Figure 4: A very obvious canal that disappears mid-root.
However even when we suspect a split canal, we cannot tell if that split occurs buccally, lingually, palatally, etc. Certainly 3-dimensional imaging becomes essential to help not only identify these cases, but also show direction.
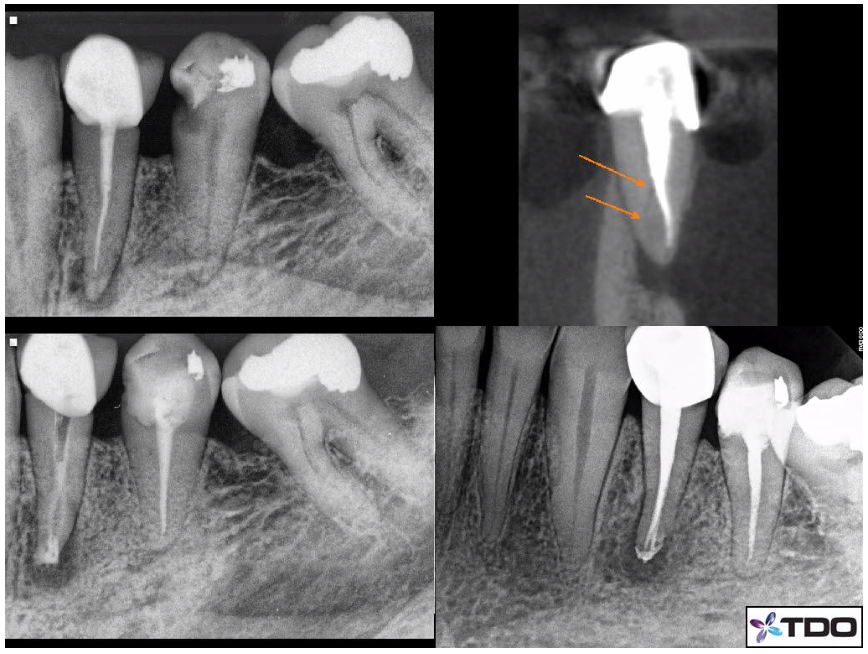
Figure 5: The Pre-Op x-ray is in the upper left side. The CBCT image shows the split canal with orange arrows that divides towards the lingual side. The lower left x-ray is with Ca(OH)2 in the canals. The Post-Op x-ray is in the lower right frame.
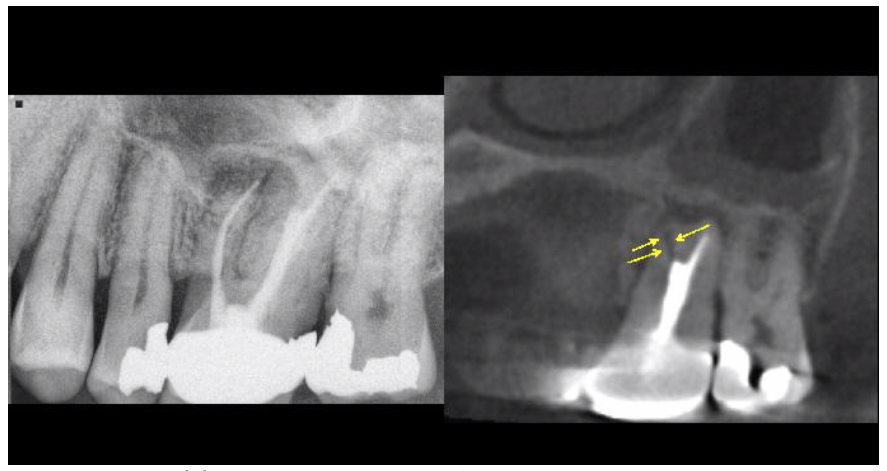
Figure 6(a): Pre-Op x-ray on the left and the CBCT showing the Proot apical split canal on the right.
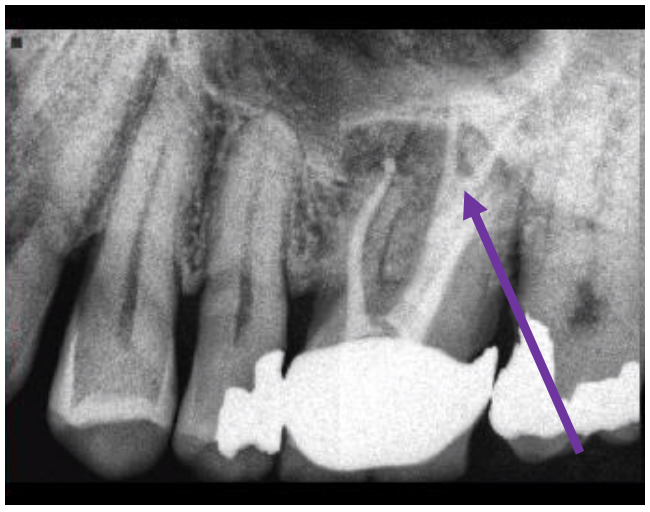
Figure 6(b): The P canal splits about 5mm from the apex.
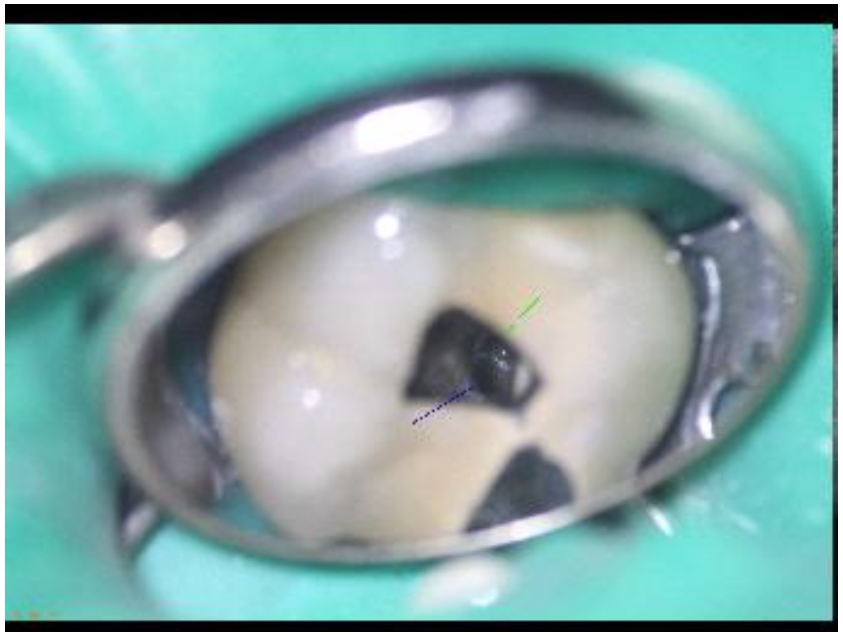
Figure 6(c): Under high magnification we can often see the canal split which certainly aids in shaping/irrigation and obturation.
CBCT imaging is critical in every day endodontic practice, but especially in unique anatomy. In cases like this, a tooth’s endodontic success hinges upon finding those split canals. Not finding, shaping and obturating those canal spaces will allow tissue or bacteria to remain thus risking the outcomes we expect of our endodontic therapies.
In my own personal CBCT evolution, I have become more dependent upon this technology. Originally, perhaps 6-7 years ago when we first brought 3-dimensional imaging to TCF MicroEndodontics, I perhaps used it for 10-15% of patient cases. I now find myself using it upwards of 60+ % of cases. I can understand the position of using this technology for every case as unexpected findings occur often enough that even the seemingly most basic case (as seen on a 2D periapical radiograph) can have unusual anatomy or unique diagnostic information appreciated only 3 dimensionally. I have seen the same evolution in my colleagues here at TCF MicroEndodontics as well. We talk about this quite literally multiple times a day in discussions of cases or situations we encounter.
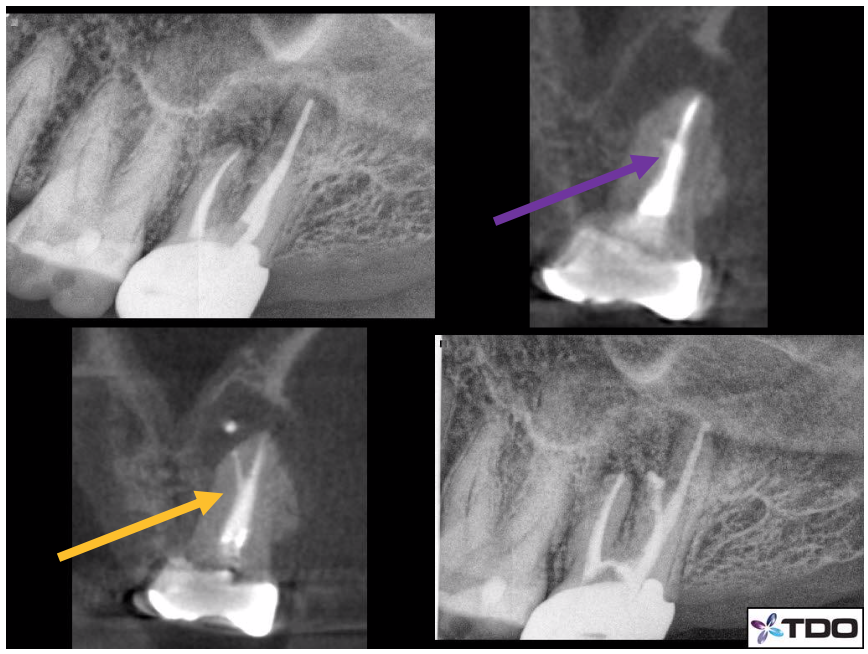
Figure 7: Here is was a challenging retreatment case in which the Pre-Op x-ray shows a failing RCT. The PA x-ray (upper left) shows a well performed original RCT. However, the CBCT coronal slice of the MB root shows something unusual about 4mm from the apex (purple arrow). The lower left shows a split canal that was found/shaped/obturated in a Post-Op CBCT (orange arrow). The Post-Op PA radiograph in the lower right does not show any evidence of that split.
Once this split canal system has been identified, we then must perform proper shaping, irrigation and obturation. That part can and often is where the real challenge comes. The usual approaches come from enlargement (to some degree) of the canal space coronal to the point of the split. That will not only allow improved visual of the split through the microscope, but also ease of placing a file into the split canal. Certainly, care must be taken not to overly enlarge that space, remaining mindful as to not weaken the tooth structure.
Pre-bent hand files are essential as well. Depending on the location of the split, we would recommend pre-bending those files into different contours. For example, a split of the canal system “higher or more coronal” within the root can be found with a longer or less acute bend in the file. A deeper split, or what we might even determine to be an apical split, can be best shaped with a shorter and more acute bend to the tip of the hand file.
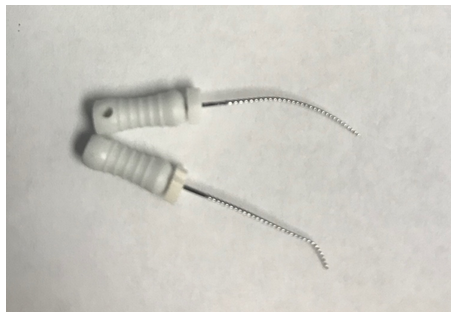
Figure 8: The top file is pre-bent in a longer, more gradual way and the lower file has a pre-bend closer to the apex of the file that is shorter.
Creating a predictable/reproducible glidepath with hand files is critical. It takes lots of repetitive recapitulations, patency checks, time and patience. But once the glidepath has been established with hand files, often pre-bent rotary files (yes rotary NiTi files can be pre-bent) can be used in a similar manner. Performing these techniques with “wet” canals and lubricants aids in the irrigation of those spaces. We also employ sonic and ultrasonic energy with flexible plastic and stainless-steel tips that improves the efficacy of the anti-microbial effect of the irrigants.
Obturating is the last step, that requires its own set of challenges. Ideally, we want gutta percha and sealer within all canal spaces. But placing gutta percha into one canal will often occlude the pathway to the second canal. Again, remember these canals share a common orifice coronally. Thus, if the orifice is not very large then two gutta percha points will not fit at the same time. In straighter canals (lower incisors with two canals) typically we can fit one cone at a time with good visibility. But with more curved canals, fitting one cone at a time accurately is difficult. During placement of the gutta percha, the cone fits into the “other” canal, meaning the canal that you did not intend for the gutta percha to enter. Gutta percha cones can be pre-bent as well, but without the “staying pre-bent” ability of stainless-steel hand files. Once the cone enters the orifice, the pre-bend of the gutta percha quickly unbends to conform to the orifice and coronal canal shape. That being said, with practice of pre-bent gutta percha and angular entry pathways we can get the cone into place. I prefer to first obturate the more challenging of the two canal pathways; the canal that splits more acutely. Thus, if the gutta percha ends up occluding the “easier canal pathway” we can remove it more predictably to then obturate that canal without disrupting the first filled canal space.
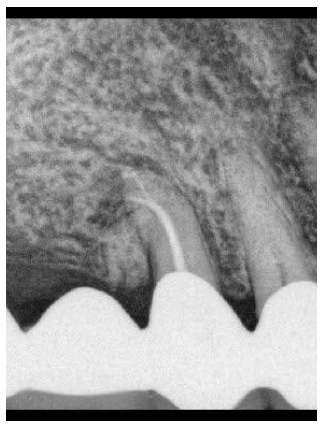
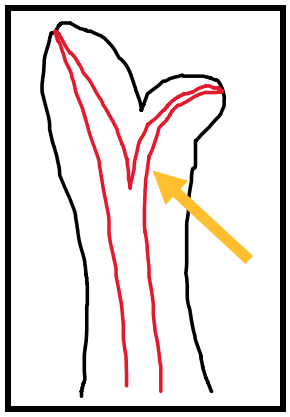
Figure 9: Arrow (orange) pointing to the canal that I would obturate first.
There are times in which the canal split is so challenging to obturate with gutta percha that we can only seal that space with sealer. Typically, these are cases in which the split is very deep (very apical positioned) and takes an acute turn from the main canal space. Using techniques to obturate those spaces with sealer is the only way. But this does come with less predictability. Other than an apicoectomy which would eliminate the apical split entirely, and can be reviewed in our past blogs on apicoectomy, the sealer fill sometimes is the best option.
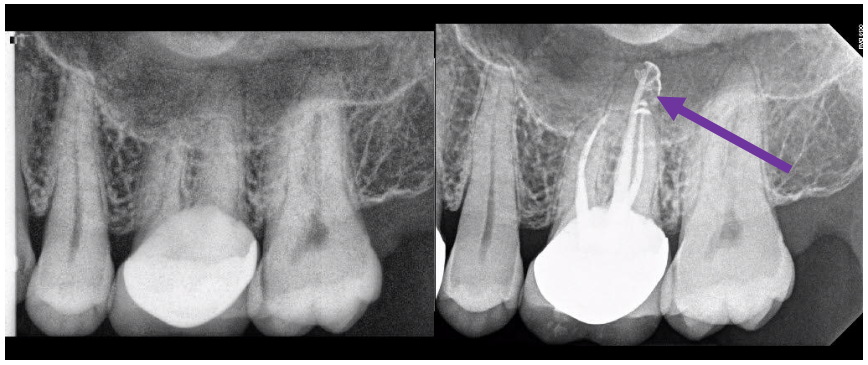
Figure 10: Sealer only fills the split apical canal that exits distally on this P canal.
In conclusion and as mentioned before, these cases can be challenging, but are a relatively common part of our endodontic practice. Canals are not always just a straight-line system. We have to expect the unexpected all the time. Class IV canals are just another element to be aware of. Naturally, the final radiograph is rewarding; the type of final radiograph that we get most excited about, share, and congratulate each other upon.
As always, if you have any questions please ask. We will do our best to help.