A Glide Path to Predictable Endodontics
A few months ago we had the good fortune to be invited to Dr. Cliff Ruddle’s office in Santa Barbara.
The intention of the weekend was simply to talk shop, trade thoughts, and foster camaraderie amongst about 5 or 6 of us. We spent two days just eating, laughing and gaining insight into to each other’s endodontic philosophy. It was certainly unique and memorable.
Cliff made a comment that day which I found to be so simple and yet so true. He stated that if he chose just two things to talk about for the rest of his teaching career it would be 1) Accessing teeth and 2) Creating a Glide Path. Of all this thousands of lectures over the years and hundreds of topics to discuss those two points were what he felt was the most critical part of clinical endodontics. Here is a guy who has been living and breathing endodontics for perhaps 30 years and he feels these two points are the key to endodontics. I got to thinking about that lately and it’s just so brilliant. The point is that just about all endodontic mishaps are eliminated with a solid access and a reproducible glide path. Everything the follows is much more basic. And the reality is that by adhering to just a few principles of accessing and glide path creation this process is also quite straightforward.
This blog will focus upon creating the glide path and using specific instruments to achieve that goal with efficiency and ease. Historically the concept of a glide path was not as advanced or specific as the term we currently use. Most clinicians or representatives of endodontic companies would make a flat recommendation to hand file to a size 15 or 20 before introducing a bulk shaping rotary driven file into the canal system. But this just over simplifies the concept and leaves many points of potential complications. While achieving a 15 file to the working length terminus is indeed important, there are a few steps that I would like to share that will make that process much easier.
Remember the dentin triangles:
Let’s consider a molar and perhaps even more specifically the mesial root of a molar. At the transition point of the pulp chamber proper to the canal space there is typically a portion of dentin that prevents a straight-line access into the canal. This dentin “triangle” of the mesial root extends towards the distal. Conversely the dentin “triangle” of the distal root will extend towards the mesial. Similarly the palatal root area will have a “triangle” of dentin protruding towards the buccal. Essentially the dental triangle will project itself to the opposite side of whichever canal you are approaching. (In anterior teeth the triangle of dentin is located on the lingual/palatal side and protruding towards the facial).
Please go to this website and you will find a series of exceptional videos for clinical education. But let me call your attention to a few of importance for this blog. I have included a picture (figure 1) of the website here with an arrow pointing to the words “Glide Path”. Click this link and it will bring up 4 videos on the right side that are important. The third video (figure 2) reviews this concept of the dentin triangles.
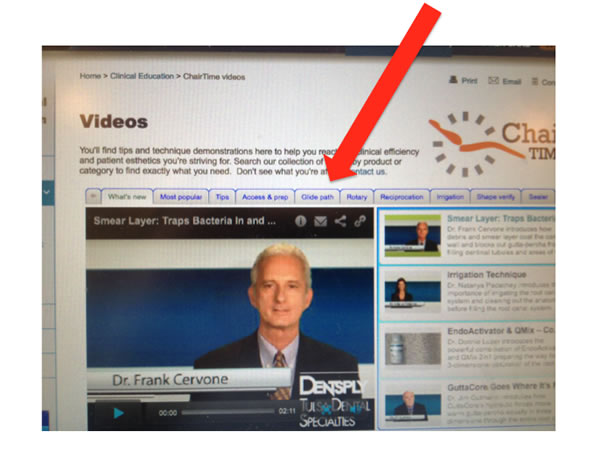
Figure 1
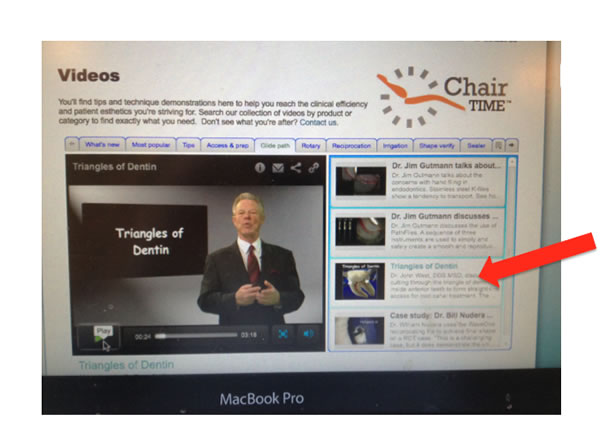
Figure 2
http://www.tulsadentalspecialties.com/default/education/demos.aspx
Also see figure 3 showing the dentin triangles of a recent case from our office. The top left is the pre-operative x-ray, the top right shows the triangle in yellow. The bottom left shows the angle of access without removal of the triangle. The bottom right shows the difference in the angle of access when the triangle is removed.
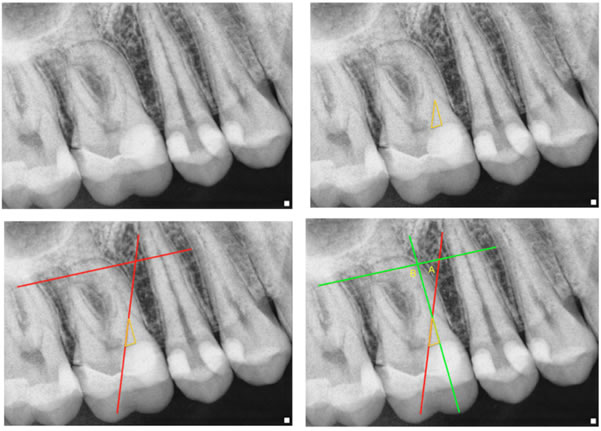
Figure 3
This triangle of dentin needs to be removed in order to gain a smoother transition for the eventual shaping of the canals.
This concept is pretty simple, but I have seen many complications that arise from a clinician approaching the removal of this dentin triangle in the wrong sequence of the glide path creation. In my opinion the triangle is not the next step after accessing into the pulp chamber even though it is the next level of the tooth from a coronal to apical continuum.
After accessing into the pulp chamber and getting the general shape of the upper half of the coronal access we will introduce a small scouting file (usually size 8) into the canal before any removal of dentinal triangles. I personally use this scouting file to handfile to a length that I would estimate to be about 2-3 mm short of the estimated working length. Once this initial scout file is negotiated to this estimated length without resistance then I will move to the next larger file (10 file) and work that file to a point of no resistance about 1mm less than where I had filed with the 8 file. And again I will do that with a 12.5 file about 1mm less than the 10 file. (I typically move from a 10 file to a 12.5 file rather than a 15 file as the 10 to a 15 is a 50% jump in size and is the largest jump in size in the sequence of all ISO handfiles).
For example, if I look at the radiograph and I suspect my length is ultimately going to be in the 21-22 mm range then I will use the 8 file to about 20mm, the 10 file to about 19mm, and the 12.5 file to about 18mm. The reason I step back about 1mm with each file is to avoid any gouging of the canal walls with subsequently larger files. With these small files there is very little chance of creating any damage to the canal system such as transportation/ledging. But keep in mind this initial handfiling should be conceptualized as a “scouting” and not a definitive handfiling process for shaping. We are not advising anything more than light finger pressures, much lighter than you would use during a true handfiling technique for shaping or reaching the apical terminus. We simply want to give ourselves a sense of flow within the canal. We want to gain a sense of confidence within the canal knowing there are no distinctive calcific barriers, and start to appreciate curvatures. As long as excessive forces are not being used, you also will not risk file separation of the scouting sequence.
**side note: if you feel resistance then consider changing the scouting file to a size 6 or perhaps even better a c+ file which has an active cutting tip and is stiffer. Again the key is light finger pressure. If you find you are using the scouting files forcefully and it is more difficult than you anticipated it might be useful to reassess the overall challenge of the case as the tooth could require treatment approaches not discussed in this blog.**
For me, once I have a free flowing 12.5 file to anywhere from 3-4mm short of the estimated working length I will then remove the dentin triangles. Thus the removal of this dentin is not done before the initial scouting phase. There are many instruments that are useful for this process, but my advice would be to use any type of orifice opening instrument with specific focus on light pressure to the outer wall of the tooth and away from the furcation. Gates gliddens are a rather common instrument for this process and one in which I use daily. I personally use the gates glidden in ascending order #2, #3, #4. These burs are meant to extend only about 4mm into the canal from the orifice level with the #2, about 3mm into the canal with the #3 and about 2mm into the canal with the #4. We also often use the SX rotary file, which is part of the ProTaper Universal rotary system. The benefit of the SX file is that it has a small tip size of 17, which will enter your scouted orifice level canal with ease. The SX file tapers up quickly to impart a nice open orifice. With pressure towards the outer wall and away from the furcation it will give a nice blended coronal shape by removing the triangle of dentin. The SX only needs to penetrate about 7-8mm into the canal from the orifice level. Both techniques are quite effective, and quick. They open the orifice level of the canal to give you more definitive and straight-line access to the middle third of the canal. In both cases if you feel the straight-line access is not sufficient then repeat the process again starting with the scouting files to ensure the initial scouted path is unblocked and reproducible. It is rather common to have to perform this process a twice to get the more ideal shape and straight – line access.
Please see figure 4 showing the SX file being used a couple of times in order to achieve the appropriate amount of orifice opening and removal of the dentin triangle.
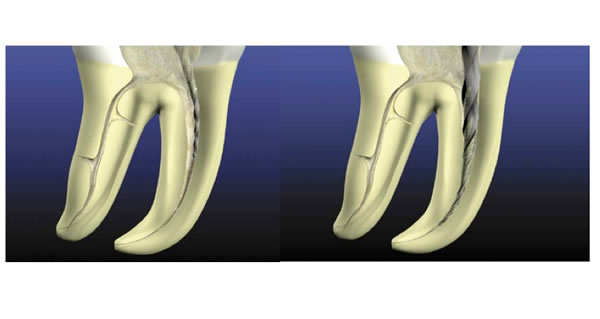
Figure 4
The next step for me is to then get the precise working length using the apex locator with a smaller file (typically a 10 file). Once the working length has been established I recommend handfiling to that length to a minimum of 12.5 file. I would also make the recommendation to not handfile any larger than a 20 file. Files at this point become much stiffer and therefore have an increasing chance for apical gouging. Please see the video again linked with the web address and under the Glide Path section of videos #1 (figure 5). This video shows the ledging of the outer wall of the apical curvature by a size 20 handfile.
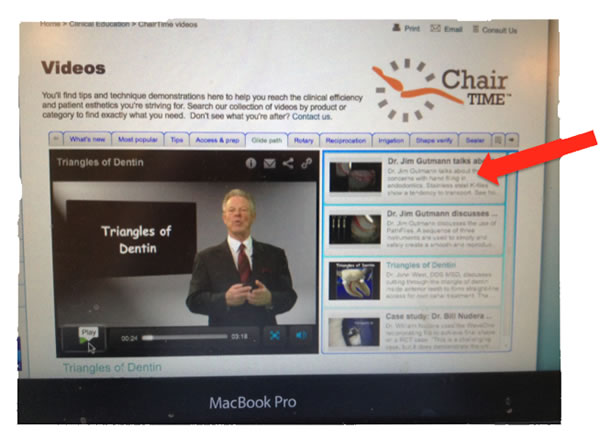
Figure 5
http://www.tulsadentalspecialties.com/default/education/demos.aspx
At this point I would make the recommendation to introduce a specific Guide Path rotary file. Certainly everyone is aware of rotary files for bulk canal shaping. But Tulsa Dental Specialties also makes two remarkable files for guide path creation: PathFiles and ProGliders.
The PathFiles are a 3-file sequence with continuous taper and the recently introduced ProGliders have incorporated all 3 files into just one with a variable taper.
The PathFiles have a continuous 0.02 tapered with tip sizes of 13, 16, and 19 corresponding to the colors of purple, white and yellow. The flexibility of these files is truly unparalleled. They are used in a sequence smallest to largest (13,16,19). As you can see by the numbers the tip sizes offer a rather flush sequence from the handfiles you previously used of a 10 and/or 12.5 to length. By the end of the 3-file sequence you have given yourself a smooth glide path to essentially a size 20.
**Reintroduce that final PathFile yellow 2-3 times to the working length to make sure your glide path is consistently reproducible. One common mistake is that clinicians will assume they created a glide path after reaching the terminus just once. They then encounter subsequent blocks because they did not gain a consistently reproducible path before they advance to the next step of bulk shaping to the canals. Make sure you have patency as well by extending the tip of a handfile “or” the PathFile out of the apex by 0.5-1.0mm.**
View the video in the link below and figure 6 shows the red arrow pointing to the video explaining the advantages of the PathFile. The ProGlider has the same principles, but with just a single file.
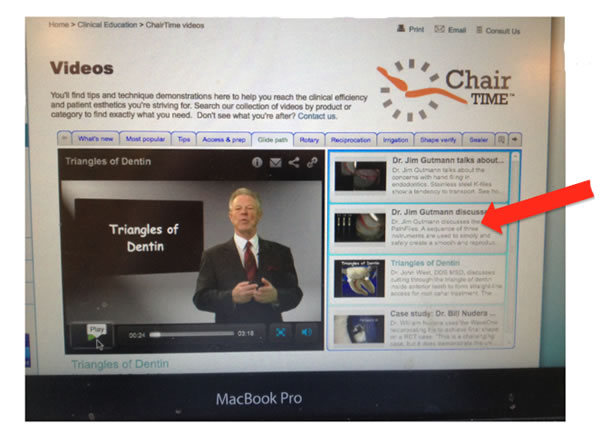
Figure 6
http://www.tulsadentalspecialties.com/default/education/demos.aspx
The newer ProGlider file has a tip size of 16 that starts with a 0.02 taper and increases with a variable taper so that at the max diameter its taper is about 0.08. This imparts just a bit more shape throughout and gives just a bit more freedom and smoothness within the glide path. Another great aspect is that this file also incorporates the M-wire nickel titanium metallurgic advantage for flexibility and strength. In my opinion, M-wire products have a considerable advantage that can be felt with your fingers. Once the ProGlider has been used to the working length with a consistently reproducible pathway, you can then start your bulk root shaping with the shaper files.
I advise that you watch the video on this link to gain an appreciation for the ProGlider file; its dimensions and how that will help to create the glide path.
http://www.tulsadentalspecialties.com/default/endodontics/glidepath/ProGlider.aspx
See figure 7 comparing the PathFile and the ProGlider.
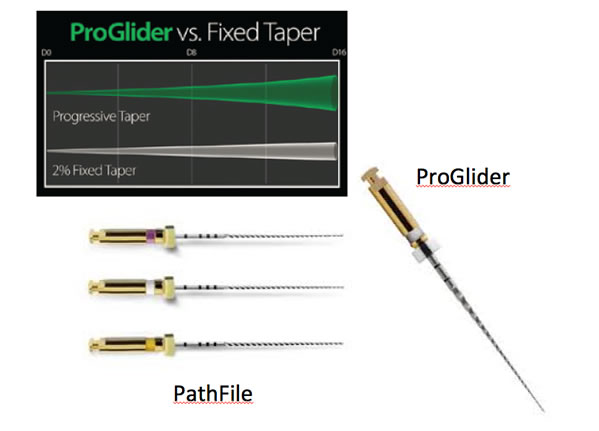
Figure 7
I hope this blog helps gives a few pointers to your endodontic approach in your office. While it might seem involved, it truly is pretty straightforward for most standard endodontic cases. Certainly there are anatomical features and some teeth that will require some adjustments to this approach, but keep in mind that once you have mastery of the glide path the entire endodontic process becomes so much less complex.
As always if you have continued interest in this and wish to visit our office or sit down with us to review, we will indeed make ourselves available.
**For more information on these glide path files please contact your local Tulsa Dental Specialties representative.**
