Tips to Finding the MB2 in Maxillary Molars
Today’s blog will focus on the ever elusive, white whale of endodontics, the mesial lingual or MB2 canal.
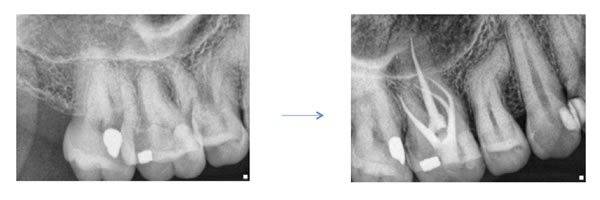
Case by Dr. Michael Sherman
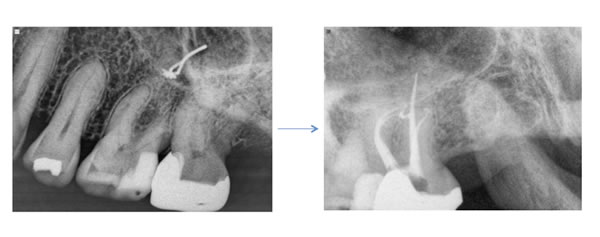
Case by Dr. Adam Monroe
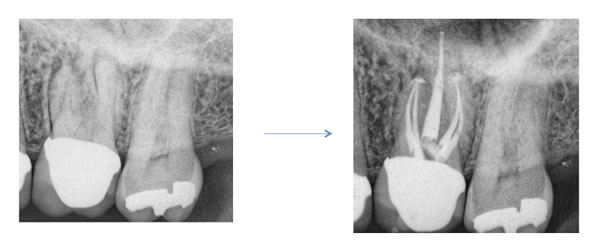
Case by Dr. Michael Brown
Historically the dental literature reported an occurrence of this canal to be found in about 60 percent of maxillary first molars and 30 percent of maxillary second molars. With the introduction of high magnification into the field, clinicians found this canal at a rate much higher than what was reported in the past. The higher occurrence has since been verified in the endodontic literature with reports of up to 93 % in first molars and 60 % in second molars (Stropko et al, JOE 1999). In order to optimize successful treatment of maxillary molars, finding and treating the MB2 canal is essential. This canal is often difficult to find and even harder to negotiate. I have included several guidelines below that I hope will help locate and treat these canals.
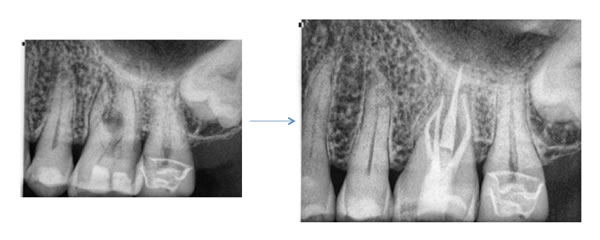
Case by Dr. Michael Sherman
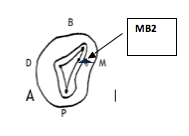
- Where is it?! MESIAL! A common occurrence when looking for the second mesial canal is to simply look palatal to the main mesial buccal orifice. Removal of the dentinal shelf lingual and mesial to the MB canal is important to uncover the MB2. I prefer a fine, flame diamond to extend my access to the mesial. Copious amounts of EDTA and alcohol further enhance visualization of the pulpal floor and any isthmus that can lead to the MB2. The ability to keep the pulpal floor clean and free of debris helps immensely. The better we can see the floor the easier it is to find the canal. The access should be in the shape of a rhomboid as opposed to a rectangle.
The image below is from an endodontic textbook published in the early nineties. Their ideal access is outlined for a maxillary first molar. In reality, the mesial lingual canal is usually mesial to where the older text books indicate. In second molars the second mesial canal is usually further palatal than is found in maxillary first molars.
- How deep? I prefer to use an ultrasonic tip to trough apically for the canal. A MUNCE bur (CJM Engineering) is also very helpful. These burs are tapered such that it is easy to visualize the tip of the bur contacting the dentin when viewed through the microscope or under high magnification. Copious amounts of water and frequent clearing of the field are very important so that we do not lose our orientation. Try to visualize the pulpal floor and stay away from the furcation. Once you have troughed three-four mm apically, stop and ensure you have remained mesial to the furcation. Staining the floor with Toulidine Blue can help highlight the pulpal floor anatomy.
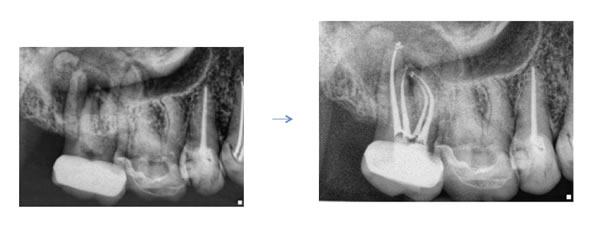
Case by Dr. Michael Sherman
- First Files? When the canal orifice is located. I prefer to use a six C plus file with a small bend to delicately negotiate the canal. Angle the file from the distal in order to gain an easier glide path down the root. Do not move up to larger files until the 6 and 8 pass easily down the canal. The path of the canal often takes a sharp mesial and buccal turn in the coronal third of the root. Considering this acute curvature, be careful with orifice openers or stiff files early in the procedure.
- Do they meet? Many times the ML canal will join the MB. However, contrary to what we often hear, even if the canals meet, the untreated ML canal can adversely affect the outcome or long term success of the endodontic treatment. Finding both canals is crucial to complete endodontics on a maxillary first molar.
- Time? Many times a root canal on an upper first molar will take me nearly two hours to complete. A lot of this time is focused on finding and instrumenting the ML canal. Make sure you give yourself ample time so that you can treat the tooth without feeling the need to rush.
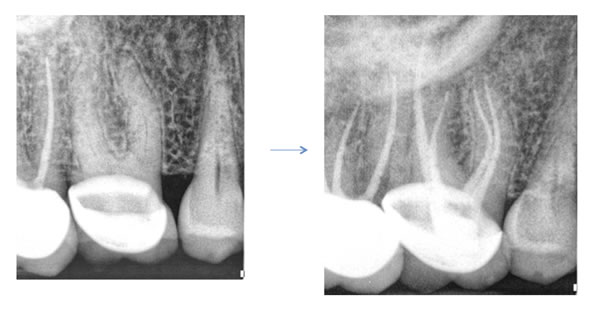
Case by Dr. Michael Sherman
Thanks for visiting Tri-City and Fallbrook Micro Endodontics, serving the greater San Diego area.
